")
An email signature adds a professional touch to your messages and provides important contact information to your recipients. Whether you’re using Outlook on desktop or the web, adding a signature is quick and easy. Here’s how to set it up.
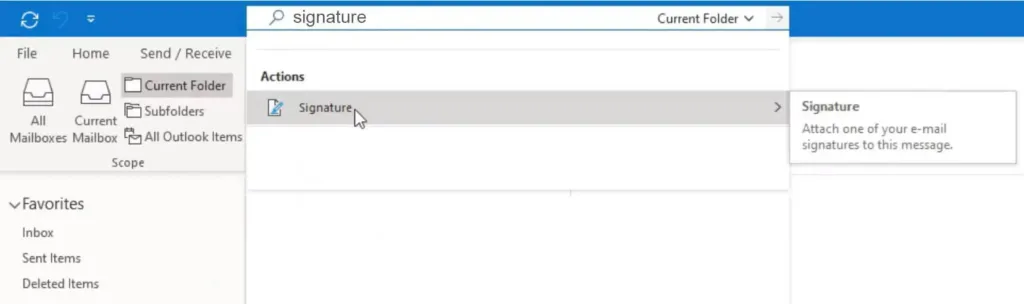
On Outlook for Windows (Desktop App)
1. Open Outlook
- Launch the Outlook app on your Windows computer.

2. Go to Signature Settings
- Click File > Options
- Select Mail from the left sidebar
- Click on Signatures… under the “Compose messages” section

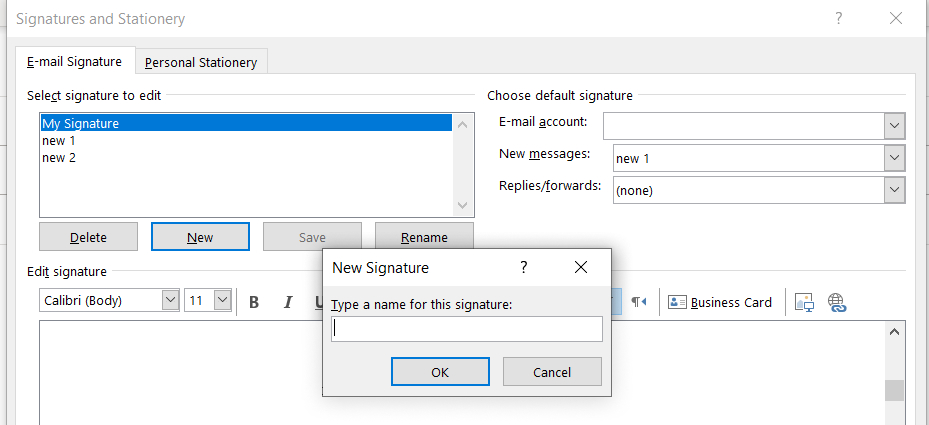
3. Create Your Signature
- Click New, give your signature a name
- In the Edit signature box, type and format your signature
- You can include your name, title, phone number, website, logo, and more
- Use formatting tools to style your text or insert an image/logo
4. Set Default Signature
- Choose the default signature for new emails and replies/forwards
- Click OK to save

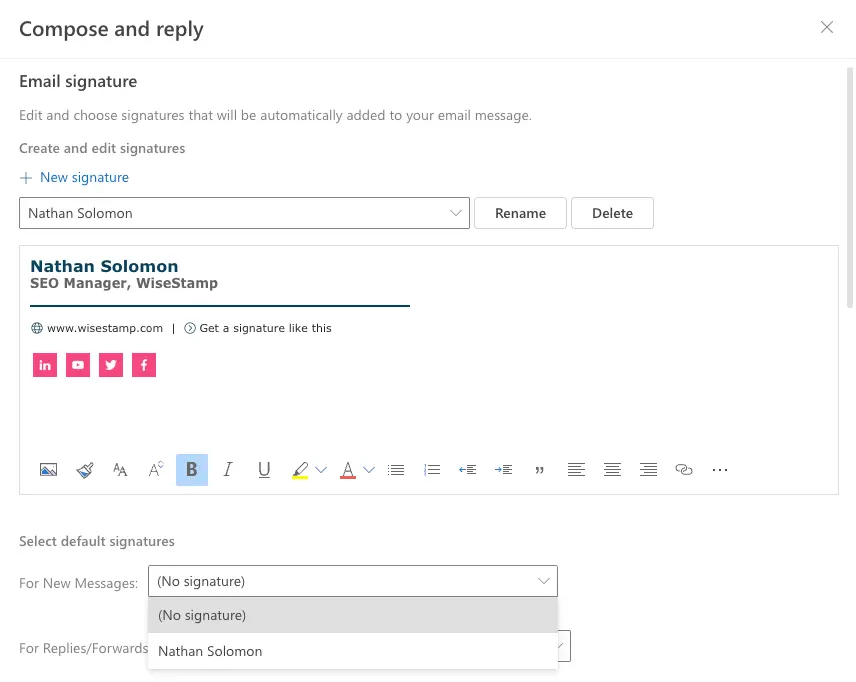
On Outlook Web (Outlook.com or Office 365)
1. Log in to Outlook Web
- Go to https://outlook.office.com and sign in
2. Open Signature Settings
- Click the Settings icon (⚙️) in the top-right corner
- Click View all Outlook settings at the bottom
- Go to Mail > Compose and reply
3. Create and Save Your Signature
- Type and format your signature in the editor
- Choose if you want the signature added automatically to new messages and replies/forwards
- Click Save
Tips
- Keep your signature clean and professional
- Avoid using too many fonts or colors
- Include only relevant information (e.g., name, title, company, phone number, website, and logo)
- Want your signature on mobile too? Add it separately in the mobile app settings
Need Help?
If you’d like assistance creating a professional email signature with logos and links, or syncing it across devices, we’re happy to help.
Contact All in IT Solutions today for expert Outlook support.
- Phone: 1300 255 464
- Visit: Support Page