1. Check Your Printer’s Error Lights
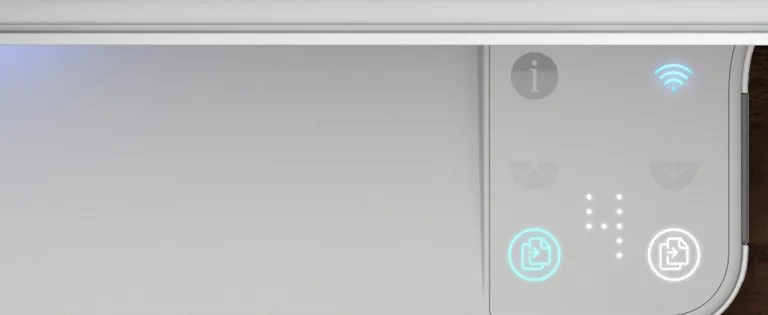
Frustrating as they can be, printers do sometimes tell you what the problem is so you can avoid trial-and-erroring your way through the troubleshooting process. Your printer may be showing an error message through a series of cryptic flashing or colored lights on the printer itself.
It isn’t always clear which lights mean what, though, so you may need to check the manual to decode what your printer is saying. If you lost the manual, you can usually find support pages or download a PDF copy on the manufacturer’s support website.
Once you’ve figured out the error—printer jam or no ink—jump down to the corresponding section of this guide to diagnose it further. (If your printer isn’t showing an error, keep reading.)
2. Clear the Printer Queue

Sometimes, your computer’s print queue can get jammed up with old documents that failed to print for one reason or another, holding up the document you need right now.
Right-click on the printer icon in Windows’ notification area, then choose Open All Printers to see a list of currently queued items. Otherwise, head to Settings > Devices > Printers & scanners, then click your printer in the list and choose Open queue.
In macOS, you can view the queue by clicking the Print Center icon that appears in the Dock during the printing process. You can also go to System Settings > Printers & Scanners, choose your printer, then click the Printer Queue button.
You can then manage the queue if you right-click any old items stuck on the list and clear them to get things chugging again.
3. Restart the Print Spooler
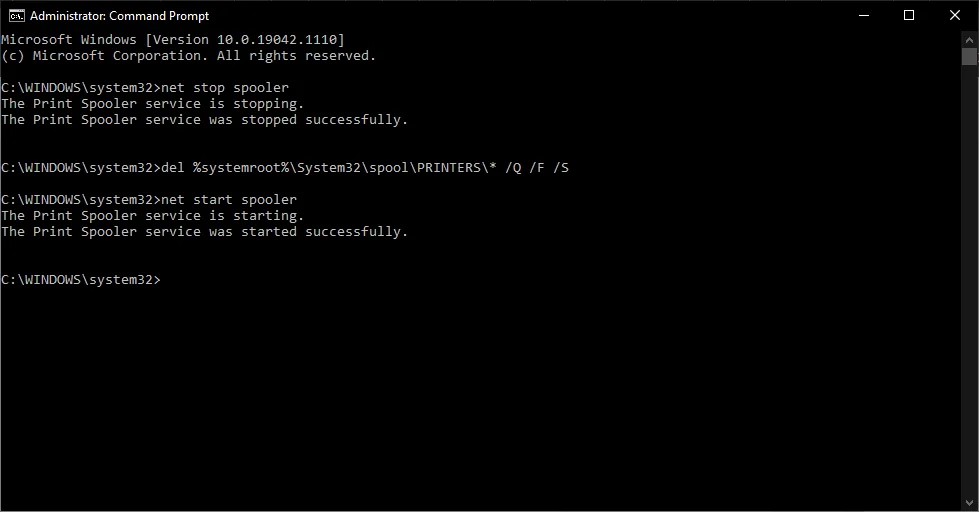
Alternatively, Windows allows you to restart the print spooler, which will try to print those documents as if they were just added to the queue (so you don’t have to clear them).
There are a few ways to do this, but the easiest is probably from the Command Prompt. Open the Start menu, search for “Command Prompt,” right-click the option that appears, and choose Run As Administrator. Then paste in the following commands, pressing Enter after each one:
net stop spooler
del %systemroot%System32spoolPRINTERS* /Q /F /S
net start spooler
With any luck, this will bring your printer back to life and you’ll get the document you’ve been waiting for.
4. Solidify the Connection
If you’re trying to print over Wi-Fi, try plugging your computer in via USB. If that works, you know the problem exists with the Wi-Fi connection and can focus your effort there.
Is your printer getting a good enough signal? See if the printer shows up in your router’s network list, or try moving the printer closer to the router to see if it’s just out of range. No joke, my father-in-law’s printer doesn’t work unless all the upstairs doors are open, because they impede the weak Wi-Fi signal.
5. Ensure You Have the Right Printer
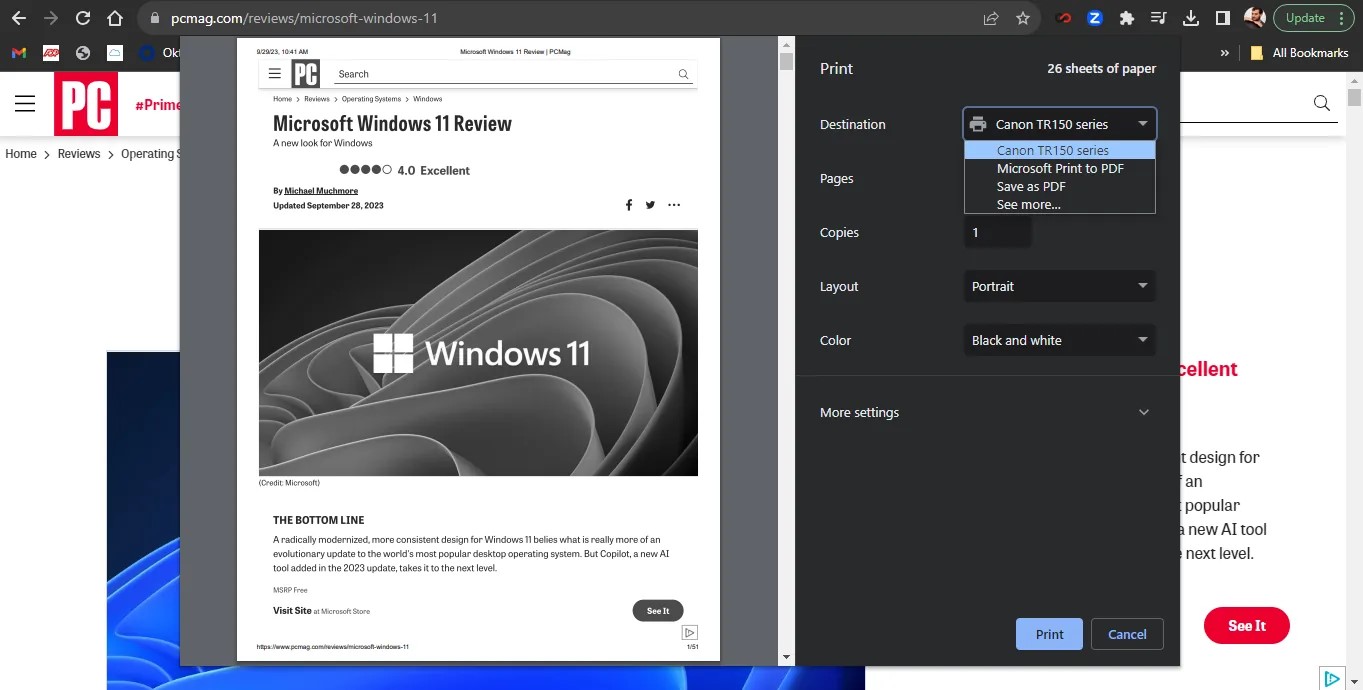
This may seem basic, but are you sure you’ve directed the document to the correct printer? If you’ve used your computer with multiple printers—say, if you go back and forth between your home and office, or if you just got a new printer at home—Windows may be trying to send documents to the wrong printer.
Try printing the document again, and be sure to choose File > Print from the menu rather than using a shortcut. Then, pay close attention to the options that appear—if the drop-down menu shows a different printer than the one you want, click it to select the correct printer before continuing. In some programs, like Google Chrome, you may even need to click See More for a full list of connected printers.
6. Check That the Paper Tray Is Full (Not Jammed)
Even if your printer has paper, you should put more paper in the tray, just to be safe. Sometimes, printers are finicky—there may be paper loaded, but if the printer can’t grab hold, it’s going to think it’s empty. Try removing the paper tray, re-aligning the paper, and sliding it back in.
In other instances, there may be some paper jammed in the mechanism. Usually your printer will tell you so, and you just need to open the access panel and pull the crumpled paper out. (Again, you may need to refer to your manual if you aren’t sure where it opens up.)
In some cases, your printer can say there’s a paper jam even if you don’t see a sheet of paper stuck in the mechanism. When that happens, you may have smaller bits of paper or other residue stuck inside the rollers that you can’t see. This means you would have to remove some of those components to clear the problem. If you aren’t comfortable doing so, bring it into a PC repair shop.
7. Install the Drivers and Software

When you plug a printer into your PC, Windows will usually grab the necessary drivers for you. But in rare cases, you may need to head to the printer manufacturer’s website, look up the support page for your model, and download the driver or software package manually. If you haven’t done so, try that now.
Don’t worry; this process should be much simpler in the near future as Microsoft plans to discontinue support for third-party printer drivers over the next few years.
8. Add Printer

If you’re using your printer over Wi-Fi, you may need to add it to Windows’ list of available printers before Windows will offer it as an option. In Windows 10, head to Settings > Devices > Printers & Scanners and click the Add a Printer or Scanner button. For Windows 11, open Settings > Bluetooth & devices > Printers & scanners, then click Add device.
On a Mac, go to System Settings > Printers & Scanners and click the + button. Your computer should search for printers on the network, and when it finds the one you’re looking for, click on it to add the printer to your list. Now, you should be able to print a document.
9. Fiddle With the Ink Cartridges
If your printer tells you it’s out of ink, but you know it isn’t, there are a few things you can do. First, the print head may be clogged or dirty, and you can clean it out through your printer’s built-in cleaning routine (which you’ll find detailed in the manual).
Alternatively, if your printer’s heads lie on the ink cartridges themselves—the little copper strip where the ink comes out—you can blot it with a wet paper towel to clean it up. Once ink starts to flow more freely onto the towel, give it a quick dab with a dry paper towel before re-inserting the cartridge.
If you have a laser printer, you may be able to get a bit more toner out of the cartridge by shaking it from side to side, then re-inserting it.
It’s also possible your printer just doesn’t realize you put in new ink cartridges. If it doesn’t detect new ink automatically, there may be a setting on the printer that allows you to “reset” the fill levels. Check your printer’s manual to see how on your specific model.
Remember that certain third-party cartridges may cause problems, so try genuine cartridges from the printer manufacturer to see if they work better.
10. Run the Printer’s Self-Test
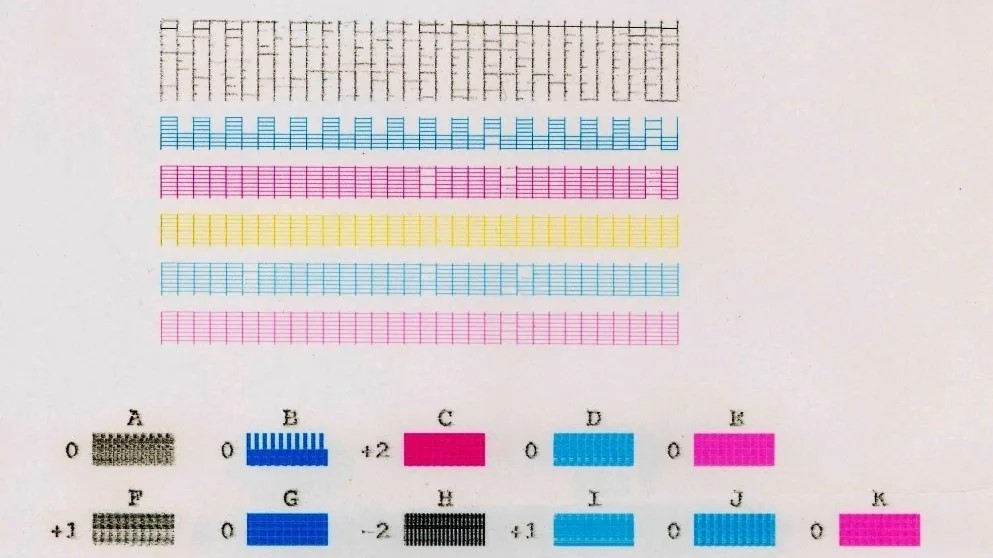
If you still can’t figure out the problem, it may help to run a few diagnostic tests. Both your printer and your computer can print test pages that may help you narrow down your issue.
You can usually run your printer’s self-test by pressing a series of buttons as the printer boots up, which you’ll find outlined in your printer’s manual. Windows’ test pages can be printed by heading to Settings > Devices > Printers & Scanners. Select your printer, then click Manage > Print a Test Page.
On a Mac, open System Settings > Printers and Scanners, then select your printer. Click Open Print Queue > Printer and choose Print Test Page.
If your printer’s own test page comes out fine but the computer’s throws an error, you can be reasonably sure you have a software problem. If the printer can’t even print its own test page, then you’ll want to focus on repairing the printer rather than driver or software issues.
If you’re lucky, your printer may even give you a test page with an error code or other information on it you can decipher.
